Tutorial: Cat eye effect
Posted on: March 25, 2010
- In: Makeup tips | Tutorials
- 4 Comments
Hello~ It indeed has been a while! I have been MIA these days…But I am back with many post ideas, and here is a detailed tutorial for compensation!
This spring season, besides all the candy colors on your face, you will also need distinct eyeliners to deliver an awakened look. In this post I will teach you how to achieve a basic cat eye makeup step by step.
1. Prime your entire eye lid. I am using Urban Decay Eye Primer Potion
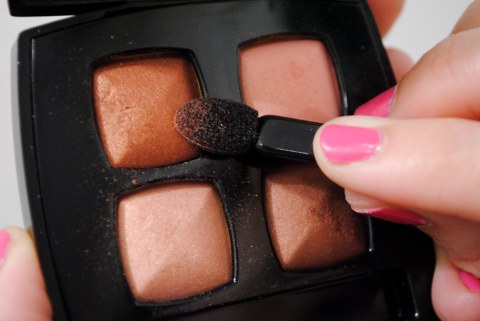
2. Choose a darker shade of brown. I am using the darkest brown from Chanel Iridescent Effect Eyes palette.
3. Use the applicator that comes with the palette, paint a line along the fold of your eye. If you don’t have a fold (aka you have single eyelids), paint a line a anyway.
4. Use a blending brush (MAC 217), blend the line you painted. This step is to make the shade look natural, in the same time, the darker color helps to accentuate the fold of your eye.
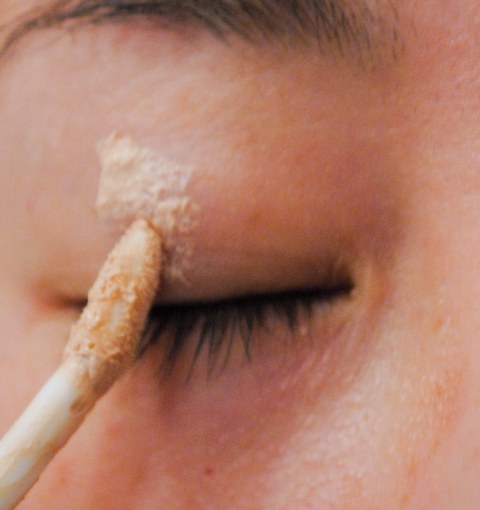
5. Choose a base/highlight color. I am using MAC Shroom.
6. Use a basic eyeshadow brush (MAC 239), apply the base color (Shroom) all over your eye lid. Make sure you don’t brush over the line you just painted. This step helps to brighten up your eye area.
7. Choose the peachy shade from the the palette.
8. Apply the peach color onto both inner and outer corners of your eye. This step helps to create dimensions for Asian eyes.
9. Blend the peach color with a blending bush (MAC 217). To reduce harsh lines.
10. Choose the brown with a gold undertone from the palette.
11. Apply the color just above the line you painted along your fold.
12. Blend all the colors. Make sure there are no harsh lines, but maintain the dimensions created in your eye area.
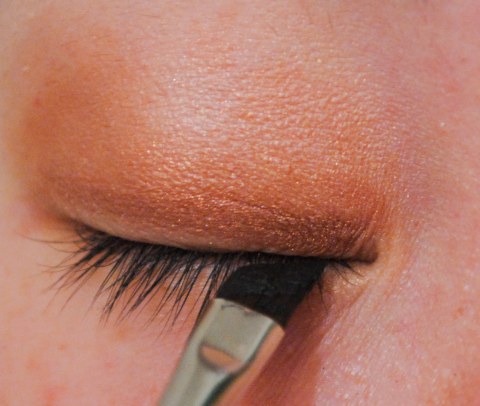
13. Use a a thin and soft angled brush (MAC 263) dab into a black gel eyeliner. I am using MAC Fluidline in Blacktrack.
14. Warm the gel eyeliner on the back of your hand. So the cream will be easier to apply.
15. Now be very careful when you are doing this step. You need to keep your hand very steady. Start drawing the line from the inner corner of your eye.
16. Draw the line along your lash line, and end the line with a thick wing at the outer corner of your eye. The thick wing helps to open up your eyes and make your eye look wider.
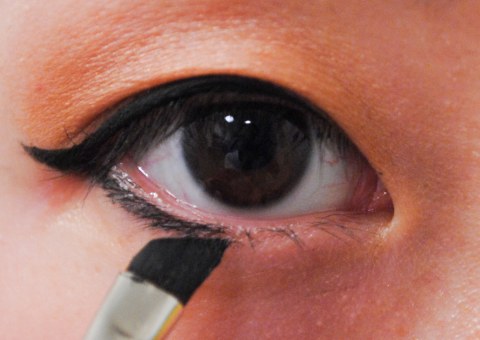
17. Before this step, you will need to brush your lower lashes upwards, because the lower line you need to draw should be just below the lower lash line. Again, this step will also help to widen your eye. Draw the line and stop mid-way.
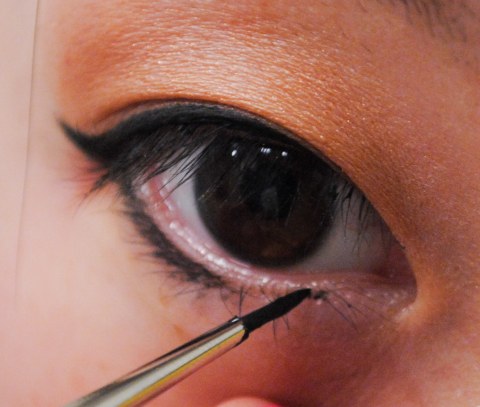
18. Use a thinner brush (MAC 210) and dab it into the gel eyeliner. We are going to use this brush to finish up the lower eye line.
19. Draw a thinner line from the inner corner of your eye, until the thin line meets the thicker one in the middle.
20. Use a Spiral brush for lashes (MAC 204) to separate lashes and brush the upper lashes upward and lower lashes downward.
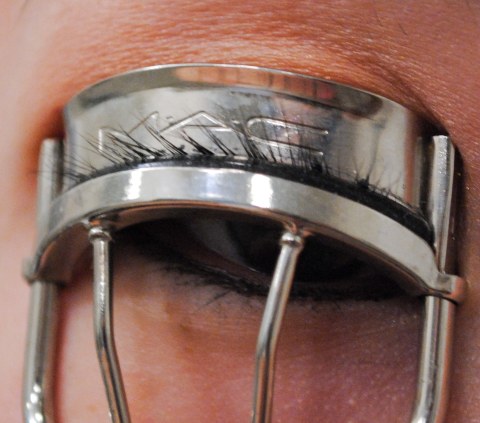
21. Use a eye lash curler curl the upper lashes.
22. Apply mascara to both upper and lower lashes. Here I use Chanel Inimitable in black.
23. Ewww…this is my least favorite picture…But to show you how…here it is. This will help to really brighten up your eyes. Make sure you use a eyeliner pencil. Because eyeliner pencils are the most sanitary form to be applied onto your waterline. As long as you clean your pencil before every use (just simply use a tissue wipe away the surface on the tip). One thing you have to keep in mind: sharpen them regularly, and DO NOT EVER SHARE YOUR EYELINER PENCIL WITH OTHERS!
Make sure you clean the clumps on your lashes, and and fall-outs from previous makeup application. And here you go! A natural cat eye!
Enjoy!
4 Responses to "Tutorial: Cat eye effect"
thanks for the comment, and sorry we didn’t have time post your tag yet. next post for sure 🙂
my bf dyed my hair, i think he did a pretty good job. lol.
i love the mac fluidline it is my favourite 😀











March 25, 2010 at 4:21 PM
WOW your toturial is SUPER detailed and your picture is super profesional looking!! nice toturial~~!
😀
March 31, 2010 at 8:03 PM
Thank you Mei! I hope you are recovered from your cold/fever already. 🙂